What is One Stroke painting?
One stroke painting is an art technique in which you can make beautiful paintings in just one stroke. You can achieve shading, highlighting, and blending in a single stroke movement. All you have to do is to load multiple colors on a single flat or angle brush and make beautiful paintings using simple brush stroke movements. This decorative painting art can be used on a variety of different surfaces such as glass, canvas, wood, paper, fabric etc.
One stroke painting technique is an easy to learn technique for beginners and experienced hands. If you have never painted before then also you can learn this technique easily with some practice.
PROCEDURE TO LEARN AND PRACTICE:
There are few simple and easy rules to keep in mind for one stroke painting. The most important is choosing the right brush, blending surface, loading and blending of the colors.
How to choose the brush for One Stroke painting?
There are different varieties of brushes available in the market now a days. You can try with any brand synthetic or taklon brushes. Size may vary depending on the brand. But for beginning you can choose a size 16 or 3/4 inch brush.
How to choose the surface for blending the colors?
You can choose any flat surface for blending the colors such as plastic palette, glass palette, tiles, wooden palette etc. For more details about palette check my blog post: How to Start Painting: Beginners Guide
What mediums to choose for painting?
There are lot of mediums available now for acrylic painting. Floating mediums are used to get a smooth flow during painting. However, water can be used as a perfect medium. For one stroke painting, I suggest to use water as the medium.
How to load your brush?
Dip one corner of your brush into one color and other corner with another color (as shown in the picture).

How to blend the colors?
Blending the colors is the most important part in one stroke painting. Blend the brush (see the pic) in back and forth movement to get enough paint in the brush. You need to load your brush 2 or 3 times to get enough paint on your brush. You can add as many different colors as you want, but for beginners, it is best to start off with two colors.

How to learn brush strokes properly?
Brushes are flat or angle and have chisel edges (Refer image)

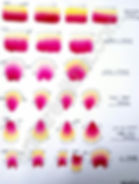
To do a stroke, simply hold the brush on the chisel edge then press the bristle of your brush, move the brush, and then lift on the chisel edge. One thing you have to remember is that the more pressure you apply, the wider the stroke will be. Move the paint brush in different ways to create different effects. A good way to practice different effects is to paint different petals as shown in the images (Refer images).

BASIC STROKES TO PRACTICE:
Tear Drop Petal Stroke:
To practice a tear drop petal stroke, hold paintbrush on the chisel edge then press down so that the bristles bend. Then move the bristle in upward direction till you create a teardrop shape and lift the paintbrush on the chisel edge. (Refer image)

Pointed Petal Stroke:
This stroke is the easiest stroke. Simply lean down on the chisel edge and slide the paint brush up to the tip of the petal and lift on the chisel edge (Refer image). If you want the petals to bend, then slightly twist your brush.

Shell Stroke:
To paint a shell stroke, hold your brush on the chisel edge then press the bristle down and wiggle your brush in the upward direction and end in the chisel edge. For more clarity refer the image.

U Stroke:
There are upward U stroke and downward U stroke. Hold your brush in the chisel edge then press down so that the bristle bend, then move in a downward motion without any wiggle movements and lift the brush in the chisel edge when you get the U shape. Refer image. Repeat the same procedure in the upward direction to get upward U stroke.


That’s it. Practice and provide me a feedback.
Once you practice the basic strokes you can watch these free YouTube videos to make a beautiful decorative painting
Click the below links to watch the free videos.